It's no secret. We love letterboxing. (Not sure what letterboxing is? Start here.) We started out by finding letterboxes. Now, we're graduating to planting them. But before we can plant a letterbox, we need a stamp.
In the letterboxing world there are two types of stamps. Lame, store-bought stamps (boo! hiss!) and ultra-cool, hand-carved stamps (woo hoo!). We aren't the type to go for lame so we're carving our own.
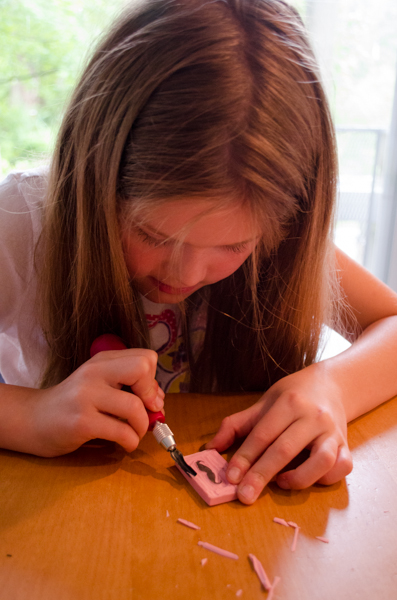
Start with a block of material. We chose Speedball Speedy-Carve. It's pink and kind of like an eraser. For our first stamps, we drew (or traced) the design on a piece of paper and heavily colored it with a pencil, then rubbed that on the Speedy-Carve leaving the design ready for carving.
Next, we carefully (and I mean CAREFULLY) carved around the design with a linoleum cutter, also from Speedball. There are a bunch of different blades so we started with the finest to trace the outline, then moved to wider blades to do the bulk work away from the design. All of the blades are really sharp so before we began we had a safety lesson for the kids. Always carve away, never touch the blade. Standard knife safety rules.
The most fun was testing. Especially with a mustache stamp. Draw a face, give it a mustache. Hmmm... to many extraneous lines. Carve away a bit more, try again.
In the end, we had a handful of cool stamps ready for letterboxes. These are all small, simple stamps. Perfect for creating hitchhikers. If you ever find one with a mustache, you'll know where it came from.
(This barely scratches the surface. For a detailed tutorial, go to the AtlasQuest page on carving stamps.)